I broke down and decided to color my hair. After a bit of research on the Internet and a detailed conversation with an Indian friend, I decided I want to try my hand at henna. Millions of Indian women have done it forever and it is supposed to be healthy for one's hair.
The first time I tried it, I was not impressed. It took THREE hours to set. It is also extremely messy! By the time I finished, not only was my hair colored, but so were my scalp (for days!), ears, neck, anywhere it touched my skin, bathroom counter, bathroom door, etc. You name it; it got henna'ed. My hair also emitted a rather unpleasant odor for over a week.
However, I kept at it monthly and by about the third month, the time and mess didn't bother me as much. I don't know that my hair is as healthy as all the claims made for henna, but it didn't appear to hurt it. My friends say they like the color and that my hair looks shinier (which equates to healthier, I guess). The color is subtle, which I like, unless I am in bright or direct sunlight, which I hate. With all that said, let's see how this process is done, eh?
Here are the items you will need to henna your hair:
1 box or package of henna (about 5-6.5 oz)
1 lemon, juiced
1 1/2 - 2 cups of strong coffee or espresso, lukewarm or cold is fine
a ceramic bowl, big enough to hold about 4 cups
a sturdy wooden spoon or stick
a pair of fitted, disposable gloves
a plastic shower cap (see note below on the grocery bag)
a dark, damp face towel for wiping henna goo off forehead, ears, etc.
First, get thyself to an Indian grocery store and look for some packages of henna. There are about 3-5 brands to choose from, around $3 each. My good friend, Pratima, recommended getting one with herbal henna in it, such as the Karishma package on the left.
As you can see, there are instructions on the back of the Karishma package. I do not follow the instructions as written, though.
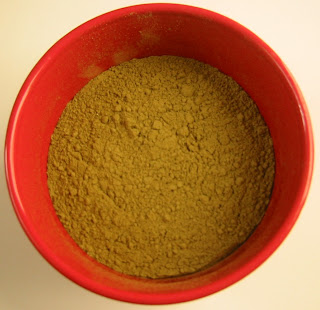
Here are the contents of the Karishma package emptied out into a bowl. I try to stick with glazed ceramic bowls as opposed to the iron bowl mentioned on the back of the package. Just the idea that putting the henna powder in to an iron bowl creates a reaction squicks me out. I fear toxic chemicals leached from the bowls will be absorbed into my skin.
Add the juice of one lemon and about 1 1/2 cups of very strong coffee. Using a wooden spoon, stir until the mixture is incorporated, add the additional 1/2 cup of coffee if needed. The consistency should be that of boxed brownie or cake mix when done. It will still be a bit lumpy, but do not worry. Just cover with saran wrap and let sit for several hours or over night.
Using disposable plastic gloves, apply the goo to your hair in sections. I start at the front, near my forehead and work back, taking about 1x3 inch sections at a time. Smear it all on my hair, making sure everything is covered, especially your roots. Cover your hair with a shower cap or a plastic bag. After three hours, rinse under lots of running water.
A few more tips I found helpful:
- Consider doing this on a Friday night so you won't go into work with tinted scalp, hands, etc.
- Wear dark, old shirts and pants.
- Cover your shoulders with a plastic grocery sack that is torn down the middle front.
- When done applying goo, use the same grocery sack to cover your head like a shower cap. Tie where needed to ensure a good fit. Toss when done.
- You can use espresso, coffee, and/or tea to get slightly different tints. I use espresso or coffee, my friend combines coffee and tea in her henna mixture. Note that espresso will most likely stain your skin darker and the rinse water for your hair will take about a week or more to run clear (coffee or tea will probably take about 4-5 days to rinse clear).
- If there is carpeting in your bathroom, remove or cover it.
- When rinsing your hair the first time, be aware there will be chunks of goop coming off that may stain your shower curtain. Bend down as close to the drain as possible to get the goop off first. Once the henna chunks are off, then you can shower as usual.
- Remember your hair will not smell good for 1 to 2 weeks, the mixture of coffee and henna is a not very appealing.
- Don't panic if the color is more brilliant the first three days, it will tone down.
- If you have a lot of gray hair, then this will leave you with a vibrant head of bright reddish/orangish hair. Not my thing, but whatever floats your boat.
Here's to thumbing our noses at Father Time. Hope you have fun koloring your kowlicks. Enjoy!


I always mix a little milk kefir into my henna mix.
ReplyDeleteDon't quote me on this, but I think anything tart will help activate the color in henna. I typically use the juice of one lemon, but I believe anything tart/acidic will do such as vinegar, kefir, etc.
Delete